PRINTER
PRINTING TEXT ON TABS OF TAB PAPER
Tab paper settings/tab paper print
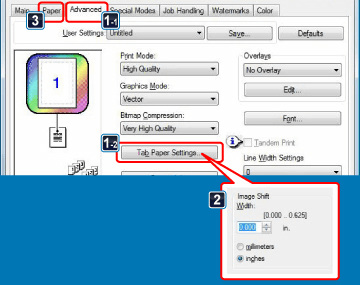
Tab Paper Settings
< 3 steps in all >
When you have finished preparing the data to be printed on tab papers in an application, take the following steps:
 Click the [Advanced] tab and click the [Tab Paper Settings] button.
 Specify the distance of shifting the image by directly entering a value or by clicking the
  Select the paper source and type.
Click the [Paper] tab, and select [Bypass Tray] for "Paper Source" and [Tab Paper] for "Paper Type".
Set the paper type of the bypass tray to [Tab Paper] and load tab papers into the bypass tray.
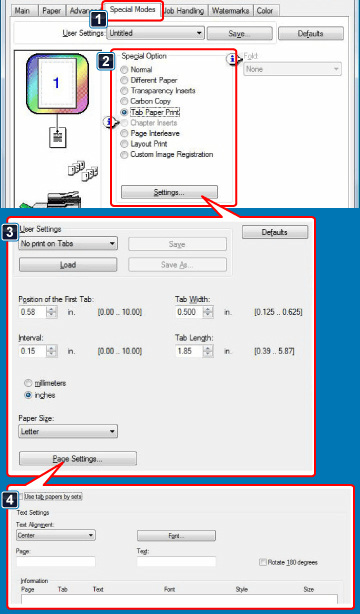
Tab Paper Print (for PCL6 only)
< 4 steps in all >
Open the data into which you wish to insert tab paper, and then select the settings.
Click the [Special Modes] tab.
Select [Tab Paper Print] and click the [Settings] button.
Select the tab position settings.
For commercially available tab paper, use the existing settings such as [A4-5tab-D] in "User Settings". For other types of tab paper, the position of the first tab, the distance between tabs, and the horizontal and vertical dimensions of the tab can be directly entered or changed using the  button. In addition, select the size of the tab paper from "Paper Size".
 Select the page settings.
Specify the pages where you wish to insert tab paper and enter the text that you wish to print on the tabs. Also select the font and adjust the layout.
- Set the paper type of the bypass tray to [Tab Paper] and load tab papers into the bypass tray.
- The tab paper settings can be stored and a stored file can be opened from "User Settings".