FAX
SAVING RECEIVED DATA
< steps in all >
 When data is received, the [Received Data] icon appears. Tap the icon.
You can also display the received data list by tapping the job status display and then tapping the [Check Received Data] key on the action panel in the job status screen.
 Tap the key of the received data you wish to save, and tap the [Save Data to Folder] key on the action panel.
- Multiple received data items can be selected.
- If you wish to select the image to save, go to step 3.
- To store the sender fax number as a number for "Allow/Reject Number Setting", tap the [Store to Unwanted Fax] key and, in the confirmation message screen, tap the [Store] key.
- When the number display setting is enabled, tapping the [Display the number display number] key displays the number display number.
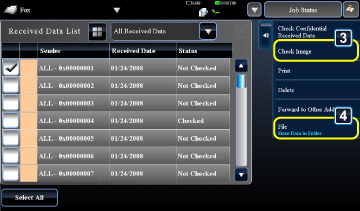
 Tap the [Check Image] key on the action panel.
- Only one received data can be selected.
 Select the image that you wish to save and tap the [File] key.
04061001.jpg
 Specify the destination to save the image and save it.