TROUBLESHOOTING
PAPER MISFEED MAP
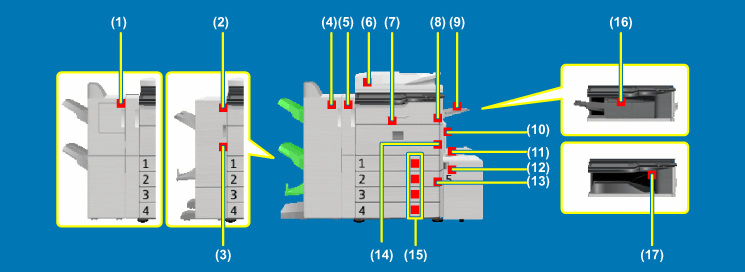
If you require more information when reading the instructions in [Look how jam is solved] in the touch panel, see the illustration below and then go to the appropriate illustration (1 to 17) for your situation.
(1) Paper misfeed in the finisher (large stacker)
-0.jpg)
Misfeed_fin4K(upper)-0.jpg
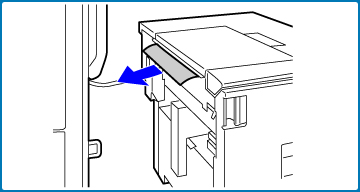
Open the top cover and remove the misfed paper.
.jpg)
Misfeed_fin4K(upper).jpg
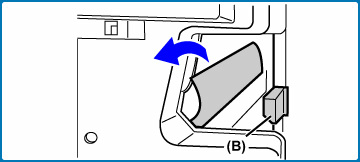
(2) Paper misfeed in the saddle finisher (top)
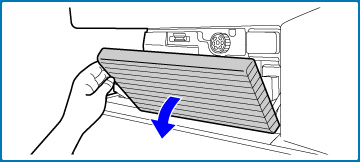
Open the top cover and remove the misfed paper.
.jpg)
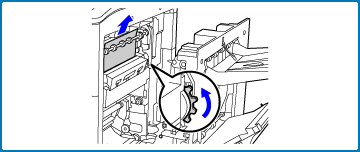
When a punch module is installed.
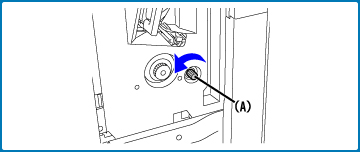
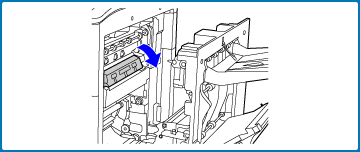
Open the front cover.
Turn the knob as shown in the illustration.
-2.jpg)
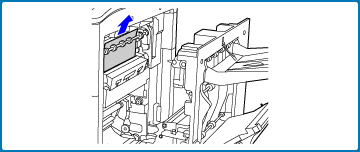
Open the top cover and remove the misfed paper.
(3) Paper misfeed in the saddle finisher (bottom)
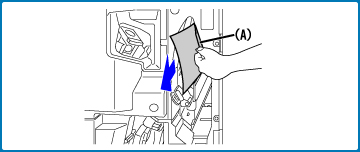
Open the front cover.
Move lever (A) to the right and remove the misfed paper.
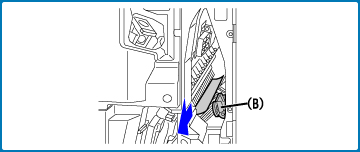
Move lever (B) to the right and remove the misfed paper.
Remove the misfed paper.
-5.JPG)
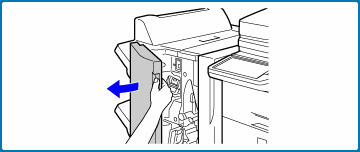
While pulling the lever, slide the saddle finisher to the left until it stops.
-1.jpg)
Remove the misfed paper.
-4.jpg)
(4) Paper misfeed in the saddle finisher (large stacker)
Misfeed_fin4K(upper)-0.jpg
Open the top cover and remove the misfed paper.
Misfeed_fin4K(upper).jpg
Paper misfeed in the transport area and the output area (the saddle stitch unit)
Open the front cover.
Misfeed_4Ksaddle-03.jpg
Move lever (A) to the right and remove the misfed paper. Release the lever and it will return to the original position by a spring.
Misfeed_4Ksaddle-04.jpg
Move lever (B) to the right and remove the misfed paper.
Return the lever to the original position after removing the misfed paper.
Return the lever to the original position after removing the misfed paper.
Misfeed_4Ksaddle-05.jpg
Rotate roller knob (A) until it no longer turns.
Misfeed_4Ksaddle-06.jpg
Push and rotate knob (B) and remove the misfed paper.

Misfeed_4Ksaddle-07.jpg
Misfeed_4Ksaddle-08.jpg
(5) Paper misfeed in the punch module
Turn knob as shown in the illustration.
Misfeed_Punch-1.jpg
Open the top cover and remove the misfed paper.
Misfeed_fin4K(upper).jpg
If the paper cannot be removed by opening the top cover, open the punch module cover and remove the paper.

Misfeed_Punch-3.jpg
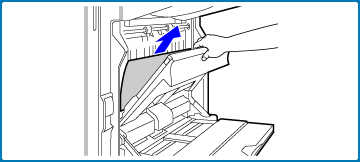
(6) Original misfeed
(When using the MX-4110N/5110N)
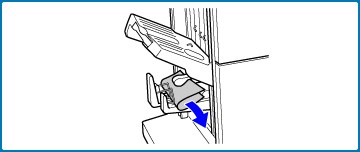
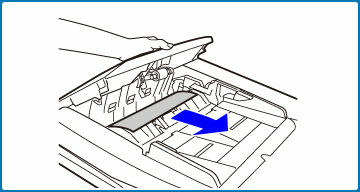
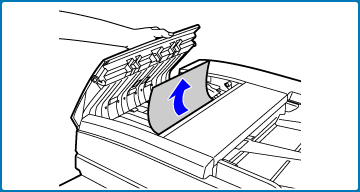
Open the document feeding area cover and remove the misfed originals.
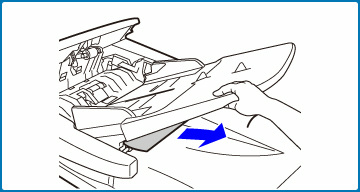
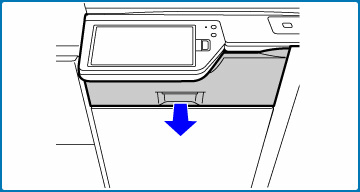
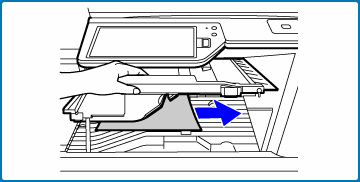
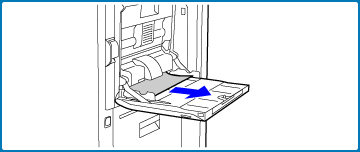
Pull out the document feeder tray and remove the misfed paper.
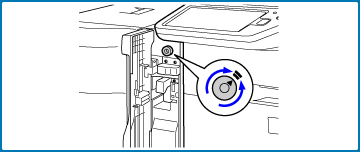
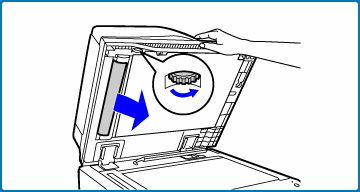
Open the automatic document feeder. Rotate the transfer roller in the direction of the arrow and remove the original.
(When using the MX-4111N/5111N)
Open the document feeder cover and remove the misfed originals.
MISFEED_ORIGINAL-4.jpg
Open the automatic document feeder. Rotate the transfer roller in the direction of the arrow and remove the original.
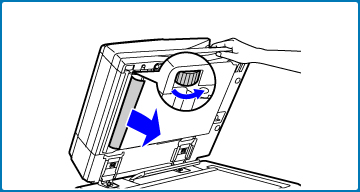
MISFEED_ORIGINAL-5.jpg
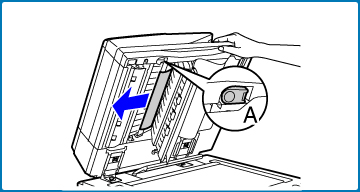
Press switch A to release the cover lock and remove the misfed original.
After removing the original, be sure to attach the cover securely.
After removing the original, be sure to attach the cover securely.
MISFEED_ORIGINAL-6.jpg
After removing the misfeed, open and close the automatic document feeder (or the document feeding area cover or document feeder tray) to clear the misfeed display from the touch panel.
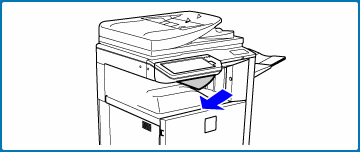
(7) Paper misfeed in the paper pass unit
Pull out the paper pass unit and remove the misfed paper.
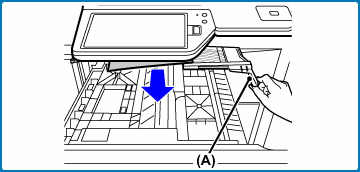
Check the paper reversing section inside the tray carefully and remove any misfed paper by pressing the lock claw in the handle section (A) with your finger to release the lock.
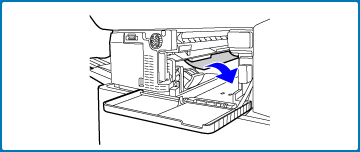
(8) Paper misfeed in the fusing unit
Rotate knob and remove the misfed paper.
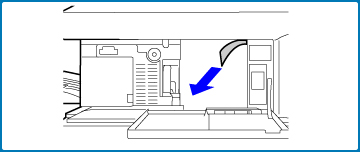
If the misfed paper is inside the fusing area, press down on the green part to tilt the fusing unit down toward you.
Rotate knob and remove the misfed paper.
The fusing unit area is hot. Take care not to burn yourself. (Do not touch any metal parts.)
Unfused toner may remain on the paper that is removed. Take care that it does not soil your hands or clothing.
(9) Paper misfeed in the exit tray unit (right tray)
Remove the misfed paper.
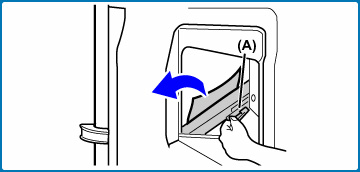
(10) Paper misfeed in the reversing unit
Open the paper reversing section cover and remove the misfed paper.
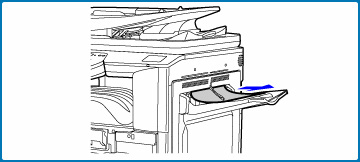
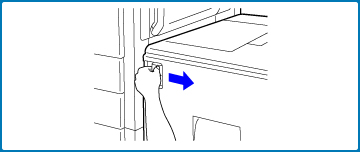
(11) Paper misfeed in the bypass tray
Remove the misfed paper.
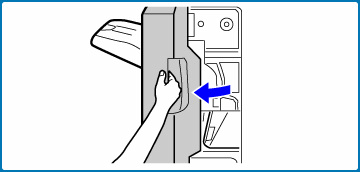
(12) Paper misfeed in the large capacity tray
While holding the tray release lever, carefully slide the large capacity tray in the arrow direction until it stops.
(13) Paper misfeed in trays 1 to 4 (side)
The misfeed may have occurred inside the machine. Check carefully and remove any misfed paper.
-1.jpg)
-2.jpg)
(14) Paper misfeed in the transfer unit
Lower the lever in the direction of the arrow to feed out the misfed paper and remove it.
(15) Paper misfeed in trays 1 to 4 (in the trays)
Before pulling the tray out, open the right-side cover and check if there is a paper misfeed. If you pull the tray out without checking, you may tear misfed paper and make it more difficult to remove the pieces that remain in the machine.
- (13) Paper misfeed in trays 1 to 4 (side)
- (13) Paper misfeed in trays 1 to 4 (side)
.jpg)
(16) Paper misfeed in the finisher
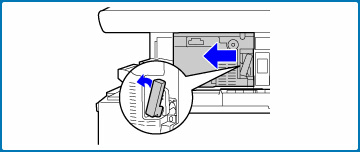
Open the front cover.
While pressing the lever over to the left, slide the finisher to the left until it stops.
Rotate the knob in the direction indicated by the arrow and remove the misfed paper.
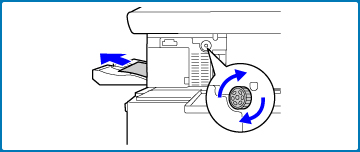
Make sure that there is no misfed paper in the machine.
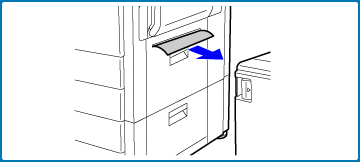
(17) Paper misfeed in the output area
Remove the misfed paper.