ADDING YOUR SENDER INFORMATION TO FAXES (FAX OWN NUMBER)
Overview
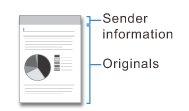
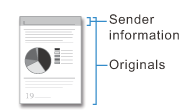
Your sender information (date, time, sender name, sender fax number or destination name, and number of pages) is automatically added to the top of each fax page you transmit.
| Outside scanned image
(factory default setting) |
Inside scanned image |
|---|---|
|
|
Example of the sender information printed
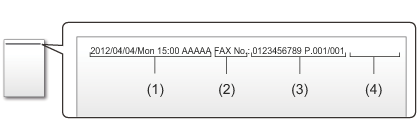
- (1) Transmission date and time
- (2) Sender Name: The sender name programmed in the machine
- (3) Sender fax number or destination name (one-touch key name)
- (4) Page numbers: Page number/total pages
 If an option to enter a destination name is specified and if the destination is not set by one-touch key, a blank is entered.
-
To set the date and time:
In "Setting mode", select [System Settings] → [Default Settings] → [Clock Adjust]. -
To store the sender name and sender number:
In "Setting mode (administrator)", select [System Settings] → [Image Send Settings] → [Operation Settings] → [Own Name and Destination Set] → [Sender Data Registration].- When you use the Own Number Setting, always configure this information.
-
To print the page numbers:
In "Setting mode (administrator)", select [System Settings] → [Image Send Settings] → [Fax Settings] → [Send Settings] → [Printing Page Number at Receiver].
The machine prints the page number and total pages. The machine prints only the page number during Quick Online Sending. -
To add the sender number or the destination name:
In "Setting mode (administrator)", select [System Settings] → [Image Send Settings] → [Fax Settings] → [Send Settings] → [Sender/Destination Name Change].