LARGE CAPACITY TRAYS
Overview
Use the large capacity trays for outputting massive prints that cannot be processed using the regular tray.
The large capacity trays store a maximum of 5,000 sheets of paper (2,500 sheets for tray 5 and 2,500 sheets for tray 6) from 12" × 18"(A3W) to 7-1/4" × 10-1/2"R(B5R).
The large capacity trays store a maximum of 5,000 sheets of paper (2,500 sheets for tray 5 and 2,500 sheets for tray 6) from 12" × 18"(A3W) to 7-1/4" × 10-1/2"R(B5R).
 Other than plain paper, special media such as tab paper and transparency film can be loaded into the large capacity trays.
To load tab paper, the dedicated guide must be installed.- If you loaded paper of a different type from the paper previously loaded, be sure to check the settings in "Setting mode".

To check the type of paper to be set in the tray:
In "Setting mode", select [System Settings] → [Paper Tray Settings]. Do not place heavy objects on the tray or press down on the tray.
Operation

Press the operation button
The operation button blinks, and the tray paper table goes down to the paper loading position. Wait until the operation button light goes off.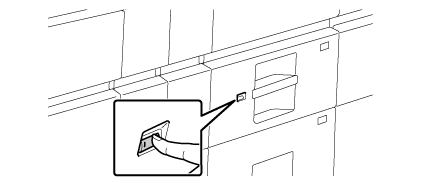 Do not pull out the tray until the light goes off. If you pull out the tray forcibly while the button lights up or blinks, a machine failure may be resulted.
Pull out the paper tray
Gently pull the tray out until it stops.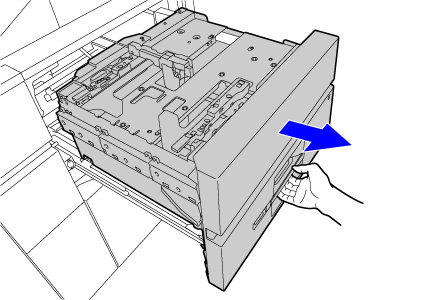

Load the paper
Load the paper with the print side facing up. The stack must not be higher than the indicator line (maximum of 2,500 sheets).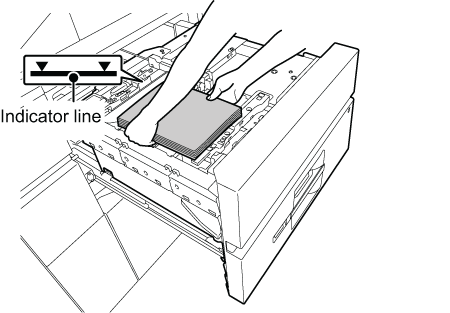 Fan the paper well before loading it. If the paper is not fanned, multiple sheets may feed at once and cause a misfeed.
Gently push the paper tray into the machine
Push the tray firmly all the way into the machine. The paper table goes up after the tray is pushed in.
The operation button blinks while the paper table goes up. The button lights up when the paper table has gone up.
Loading the tab paper
-
Remove the tab paper guide
The guide is stored in the upper tray.
-
Insert the tab paper into the tray
Place the tab paper with the print side facing up so that the tab is to the right.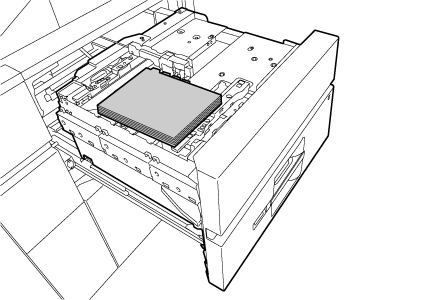 See the following figure and adjust the tab position of the tab paper.
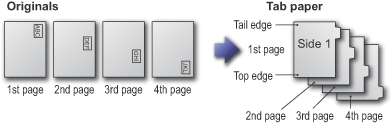
-
Place the tab paper guide
Place the guide on the top of the tab paper.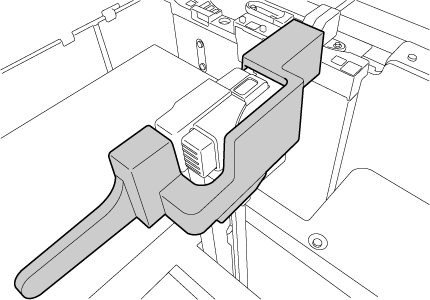
-
Gently push the tray into the machine, and set the paper type to tab paper
Using "Paper Tray Settings" in the system settings, set the paper type to tab paper.
To set the paper type to tab paper:
In "Setting mode", select [System Settings] → [Paper Tray Settings].
Changing the paper size
-
Loosen the paper guide screw

-
Slide the plate of the paper guide
Slide the plate until the red line appears at the center of the size window of the plate.
Both near and far plates slides when you slide one of those.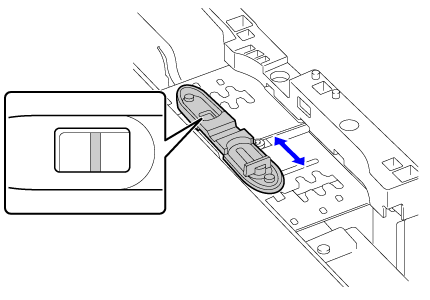
-
Adjust the paper guide to the paper size that will be used
Slide the paper guide forward or backward until the size mark of the paper to be used ( or
or  ) appears in the size window of the plate.
Both near and far plates slides when you slide one of those.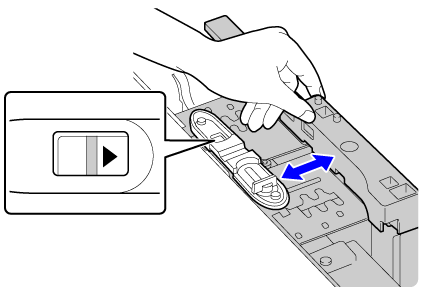
-
Secure the paper guide
(1) Slide the plate of the paper guide.
Slide the plate until the paper size to be used appears in the size window of the plate.
Both near and far plates slides when you slide one of those.(2) Tighten the paper guide screw.
Tighten both far and near paper guide screws.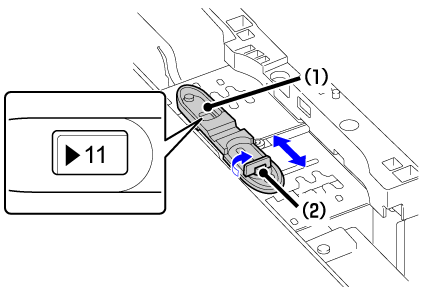

Change the right paper guide to the paper size to be used
(1) While holding the paper guide lock, slide the paper guide to the paper size to be used.(2) Release the paper guide lock.(3) Move the paper guide slightly to the right and left so that it locks into place.
You will hear a "click" when the paper guide locks.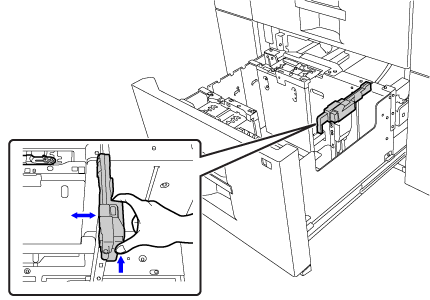

Set the paper size and paper type
Be sure to set the paper size and paper type by selecting [System Settings] in "Setting mode" → [Paper Tray Settings].
If the paper size setting is not configured correctly, automatic paper selection will not operate correctly and printing may take place on the wrong size or type of paper or a misfeed may occur.