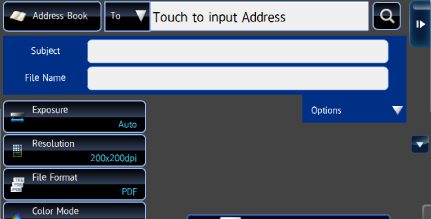
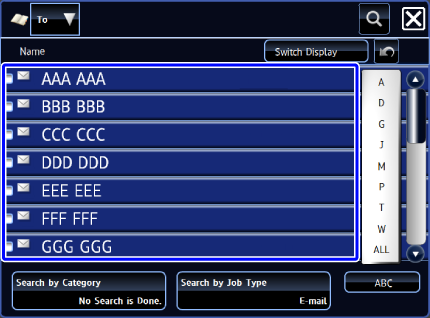
SPECIFYING A DESTINATION FROM THE ADDRESS BOOK
Overview
A destination is retrieved by simply tapping the one-touch key of that destination on the address book screen.
It is also possible to store multiple destinations in a one-touch key, allowing you to retrieve all the numbers by simply tapping the key. This is convenient when you wish to send data to multiple destinations.
An icon indicating the mode appears together with the name of the destination in each one-touch key. The icons are as follows:
| Scan to E-mail | |
| Scan to FTP | |
| Scan to Network Folder | |
| Group key with multiple destinations |

- For information on the address book, see "ADDRESS BOOK".
- For the procedure for storing an address in the address book, see "STORING ADDRESSES THROUGH DIRECT ENTRY", "STORING ADDRESSES THROUGH GLOBAL ADDRESS SEARCH", "STORING ADDRESSES FROM DAX OR IMAGE SEND LOGS" or "STORING GROUPS".
Operation

Tap the [Address Book] key


Tap the one-touch key of the destination
- The destinations displayed in the list can be narrowed down by category, job type, index, and keyword.
- By default, data is sent to the destination of the current mode only. For example, if a destination is set in the Scan to E-mail mode, the data is not sent to any other destination except for the destination selected in the Scan to E-mail mode.
- Tapping [Switch Display] allows you to change the order of destinations displayed in the list.
- When adding a destination, tap another one-touch key.
- When data is sent to multiple destinations, the number of destinations is displayed next to
 . It is also displayed if data is sent to multiple destinations when you select a single one-touch key.


- By default, the destination list which is narrowed by the current job is displayed.
- When the one-touch key is tapped and the [Display Details] key is tapped on the action panel, the detailed information is displayed. This procedure can be also used to change or add a destination for transmission.

If you select an incorrect destination:
Tap the one-touch key again to release the selection. To allow sending data to any destination other than the one selected in the current mode,
select [System Settings] in "Setting mode (administrator)" → [Image Send Settings] → [Operation Settings] → [Default Settings] → [Address Book Default Selection], and uncheck the [Apply Addresses of Sending Modes Only] box.