CHECKING, EDITING, AND DELETING THE PAGE LAYOUT OF COVERS AND INSERTION SHEETS(PAGE LAYOUT)
 The editing contents are different between the registered covers and insertion sheets as shown below.
- For the cover, you can change settings such as the paper type, copy/do not copy, 1-Sided, and 2-Sided.
- For insertion sheet, you can change only the page number you want to insert an insert sheet into.
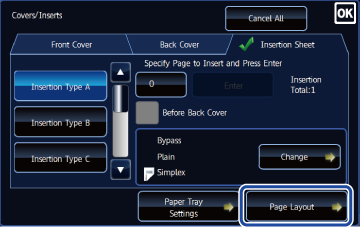
 Tap the [Others] key, and then tap the [Covers/Inserts] key.
  Tap the [Page Layout] key.
  If the settings for the covers or insertion sheets are not configured, the [Page Layout] key is disabled.
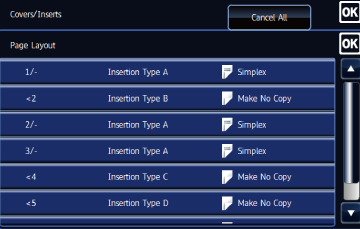
 Check the page layout.
To exit this job after checking the page layout, tap the  key.
key.
To edit or delete, tap the required key. When deleting, tap the [Delete] key. When editing, tap the [Modify] key.
To edit or delete, tap the required key. When deleting, tap the [Delete] key. When editing, tap the [Modify] key.
 Change cover or insertion sheet settings.
For the cover, you can change the copy mode. You can change the page number you want to insert an insert sheet into.
After the settings are completed, tap the key multiple times to return to the [Others] screen. Then, tap the [Back] key.
After the settings are completed, tap the
- When inserting two different inserts in succession at the same page, you can tap “Replace Order of Inserts” in the action panel of the page layout screen to change the order of the inserts.
- If you enter the number of pages of the insert page key when the [Before Back Cover] checkbox is selected, the [Before Back Cover] checkbox is unselected. If you select the [Before Back Cover] checkbox when the number of pages of the insert page key is input, the number of pages is cleared.
- When a setting other than “Make No Copy” is selected for the insert type of the insert currently being set and a different insert is already set for that insert page, the “Enter” key will be grayed out and the insert cannot be inserted.
- Only a blank insert can be inserted in [Before Back Cover]. If a setting other than “Make No Copy” is selected for copying on the insert, the [Before Back Cover] checkbox will be grayed out.