ENTERING AN ADDRESS MANUALLY
 In the base screen of a mode, tap [Text Box]
On the base screen of Internet Fax, tap [Text Box] to display the screen you want to select the address type. Tap either the [Internet Fax] or [Direct SMTP] key.
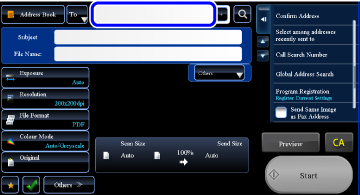
 Enter the destination address
- In data entry mode, select the mode of the destination, and enter the destination address.
- For Scan to Network Folder mode, the network folder entry screen appears. See "SPECIFYING A NETWORK FOLDER".

- To switch among [To], [Cc] and [Bcc], tap
 .
. - You can select [Bcc] if [Image Send Settings]→[Scan Settings]→[Scan Settings]→[Bcc Setting]→[Enable Bcc] is enabled in [System Settings].
- In Internet Fax mode, the reception report request screen will appear if [Image Send Settings]→[Internet Fax Settings]→[Scan Settings]→[Send Settings]→"I-Fax Reception Report On/Off Setting" is enabled in [System Settings]. If you wish to receive a report, tap the [Yes] key. If not, tap the [No] key. (When Direct SMTP is used, transmission confirmation is not performed.)