SAVING AND USING PRINT DATA
Overview
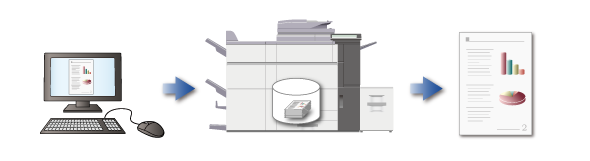
This function stores print data on the hard disk included in the machine, and prints the data using the touch panel when required. The location for storing data can be selected to prevent the data from being mixed together with data of other users
Hold Only
Data is not printed but only stored on the machine's hard disk.Hold after Print
Data is printed, and then stored on the machine's hard disk.Sample print
When you print multiple sets, you can only print one set first. After checking the contents of the first set of copies, you can print the remaining sets from the operation panel of the machine. This prevents the occurrence of excessive misprints.
- For information on how to print data stored on the hard disk of this machine, see "PRINTING A STORED FILE" of "DOCUMENT FILING".
- When printing from a computer, a password (5 to 8 digits) can be specified to assure confidentiality of the stored data.
When a password has been specified, the password must be entered in order to print the stored data from the machine.
Operation
 Windows

Click the [Job Handling] tab


Set the [Retention] checkbox to


Select a method to use to store print data using "Retention Settings"
Setting the [Password] checkbox to allows you to enter a password (5 to 8 digits). Note that you cannot set a password when specifying a storage destination in step 4.
Setting the [Create PDF for PC Browsing] checkbox to creates a PDF file for PC browsing when saving data.
Select a storage location using "Document Filing Settings"
If you selected [Custom Folder], click the [Stored to] button to select the folder name.
- When [Quick File] is selected, "Retention Settings" will be set to [Hold Only]. The password entered in the "Retention Settings" is canceled and cannot be used.
- The data format used to store data to the machine can be selected from CMYK and RGB, if necessary. Click the [Compatibility] button on the [Advanced] tab and select the format from "Rip Format".
- To store data in a custom folder, the custom folder must first be created by selecting [System Settings] in "Setting mode" → [Document Filing Control]. If a password was set for the folder, enter the "Password of Folder" in the window for selecting a storage location.

- If you have configured "Printing Policy" on the [Configuration] tab so that retention is always used, the checkmark of the [Retention] box cannot be cleared.
- If your network is IPV6, the data is stored to the main folder.
 Macintosh
-
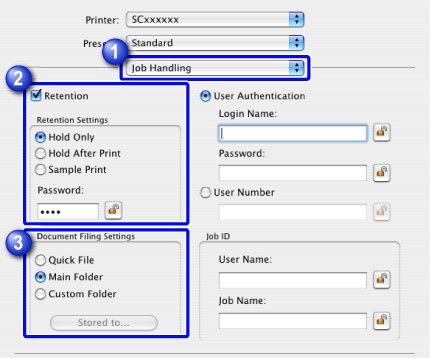
Select [Job Handling]
-
Set the [Retention] checkbox to
 Select a method to store print data using "Retention Settings".
After entering a password (5 to 8 digits), you can click the button to lock the setting. This is convenient for specifying the same password the next time.
 -
Select a storage location using "Document Filing Settings"
If you selected [Custom Folder], click the [Stored to] button to select the folder name.
- When [Quick File] is selected, "Retention Settings" will be set to [Hold After Print]. The password entered in the "Retention Settings" is canceled and cannot be used.
- The data format used to store data to the machine can be selected from CMYK and RGB, if necessary. Click the [Advanced] in [Printer Features] and select the format from "Rip Format".
- To store data in a custom folder, the custom folder must first be created by selecting [System Settings] in the "Settings" → [Document Filing Control]. If a password was set for the folder, enter the "Password of Folder" in the window for selecting a storage location.
- In Mac OS X v10.5 to 10.5.8, v10.6 to 10.6.8, and v10.7 to 10.7.2, if you wish to store document filing settings in a custom folder, click the [Custom Folder] tab.