LASER UNIT
Overview
When the laser unit becomes dirty, line patterns (colored lines) may form in the printed image. If line patterns (colored lines) appear, clean the laser unit.
Lines (colored lines) caused by a dirty laser unit
- Colored lines always appear in the same place. (The lines are never black.)
- Colored lines appear in parallel with the direction of paper feeding.
- Colored lines appear not only on output from a copier but also on prints from a computer. (The same lines appear on both copies and print jobs.)
Operation
Cleaning the laser unit

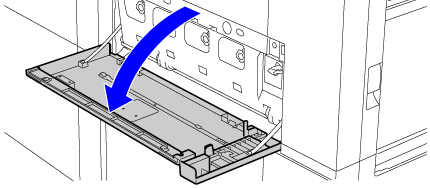
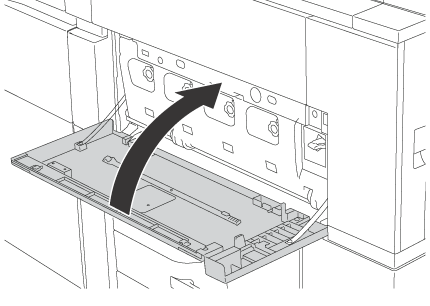
Open the front cover (lower)

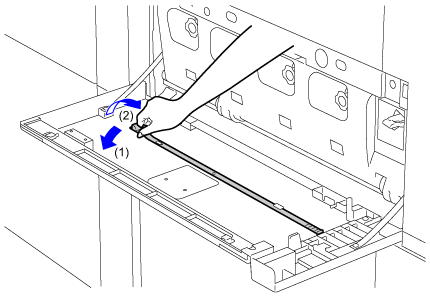
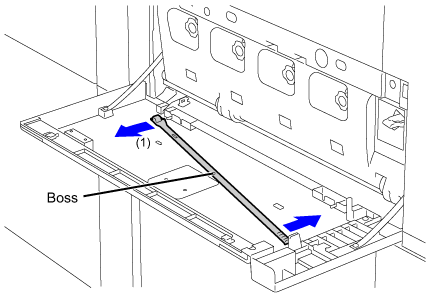
Take out the cleaning tool for the laser unit
The cleaning tool is attached to the front cover (lower) of the machine.- (1) Push the left-hand side of the cleaning tool to detach it from the hook
- (2) Put it over the hook to place in on the back side
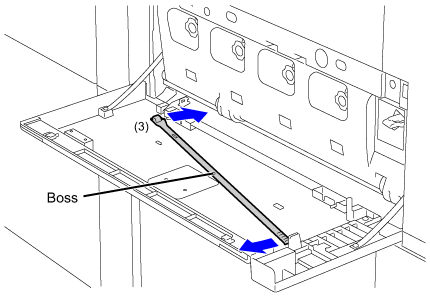
- (3) Turn the cleaning tool around the boss to detach it from the right-hand hook.

Make sure that the cleaner at the tip of the cleaning tool is not dirty
If the cleaner is dirty, remove the cleaner from the cleaning tool and replace it with a clean one. For more information on replacing the cleaner, see "Replacing the cleaner".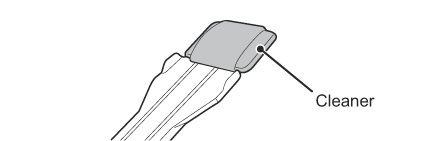

Point the cleaner down and slowly insert the tool into the hole to be cleaned in the laser unit
Be sure to point the cleaner down. Labels similar to (A) are attached to areas that require cleaning.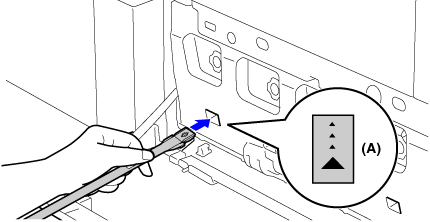

Insert the cleaning tool all the way into the hole and then pull it back out
Pull the cleaning tool out until you feel the tip of the tool leave the cleaning surface of the laser unit.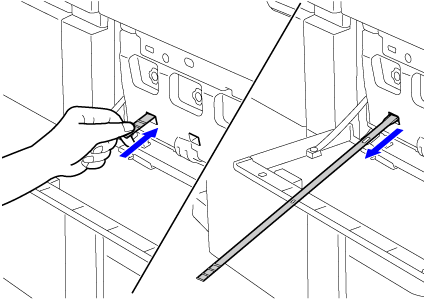

Repeat steps 4 to 5 two or three times and then remove the cleaning tool
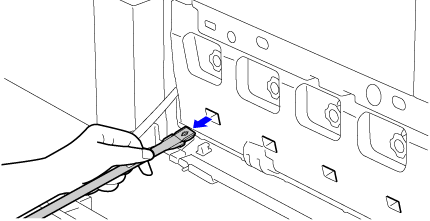

Repeat steps 4 to 6 to clean all holes (4 holes) in the laser unit
There are a total of four holes to be cleaned in the laser unit.
Clean all holes.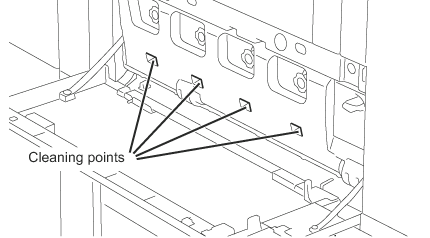

Replace the cleaning tool
- (1) Engage the cleaning tool onto the boss and turn it around it, and then put the edge (non-cleaner side) on the right-hand hook
- (2) Put the left-hand side of the cleaning tool over the hook to place it on the near side
- (3) Turn the cleaning tool onto hook


Close the front cover
Replacing the cleaner
-
Open the front cover (lower) and take out a replacement cleaner
Replacement cleaners are stored in the front cover (lower).
Grasp the end of the cleaner and pull it out of the cover.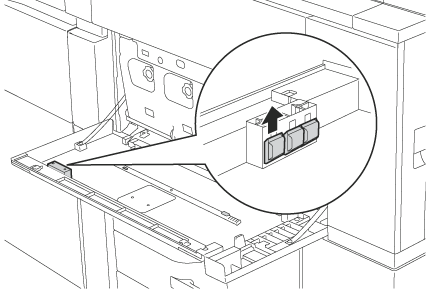
-
Remove the dirty cleaner from the tip of the cleaning tool
While firmly grasping the tool where the cleaner is attached, use your other hand to press down on the hook that secures the cleaner, and remove the cleaner.

 Put the removed cleaner back on the inner cover. After replacing the cleaner, be sure to close the inner cover.
 -
Attach the new cleaner to the cleaning tool
Align the cleaner hook with the attachment hole in the cleaning tool. Hold the cleaner firmly and push the cleaning tool in.