REGISTERING A NEW BILLING CODE
Overview
Register a new billing code.
A billing code can be registered not only from the billing code entry window but also from "Setting Mode".
A billing code can be registered not only from the billing code entry window but also from "Setting Mode".
 To register a billing code from Setting Mode
Select "Setting Mode" - [Billing Code Setting] - [Main Code List] or [Sub Code List]. Register a main code in [Main Code List], and a sub code in [Sub Code List].
 A total of up to 2,000 main and sub codes can be registered.
Shared range of billing code
The registered billing codes can only be shared in the specified group at the time of user authentication.
If the shared range is not specified, the registered billing codes are shared by all users.
If the shared range is not specified, the registered billing codes are shared by all users.
To register a groupSelect "Setting Mode (Administrator)" - [User Control] - [Organization/Group List].
Operation

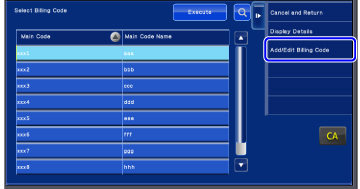
When the billing code entry window is displayed, tap the [Select from List] key of the main code.
To register a new sub code, tap the [Select from List] key of the sub code.
The subsequent steps are the same as for the main code.

Tap the [Add/Edit Billing Code] key on the action panel

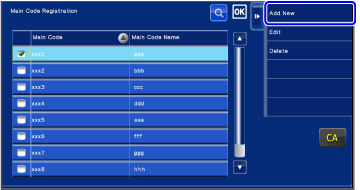
Tap the [Add New] key on the action panel.
 To return to the billing code selection window
Tap .
.
Tap the text box of [Main Code], then type in the main code.
Specify the code using up to 32 single-byte characters.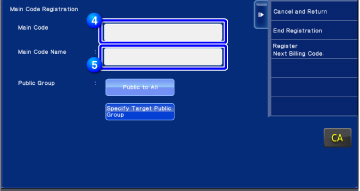

Tap the text box of [Main Code Name], then type in the main code name.
Specify the code name using up to 32 double- or single-byte characters.
If necessary, select the share range of billing code.
Public to All: Registers the billing code as a public code for all users who use the machine.
Specify Target Public Group: Limits the share range of billing code to be registered only to the specified group. Up to eight groups can be specified as a public destination.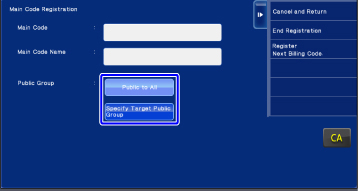 For details on how to specify a public destination, refer to "Shared range of billing code".The public destination of a billing code is not displayed if user authentication is not performed. The mode is automatically set to [Public to All].
Tap and select a group as a public destination
Up to eight groups can be specified. After the setting has been completed, tap.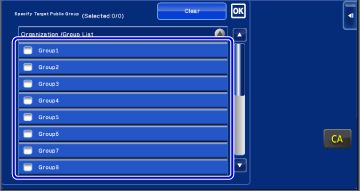 To cancel the setting
Tap the [Clear] key on the action panel. This cancels the registered public destination and returns the screen to the previous window.
To continuously register other billing codes, tap [Register Next Billing Code.].
Execute steps 4 to 7 to register the main code.To cancel the registration
Tap the [Cancel and Return] key on the action panel. This cancels all the registered billing codes and returns the screen to the previous window.
Tap the [End Registration] key on the action panel.
This finalizes the registration and returns the screen to the previous window. Tap to finish the registration procedure.To return to the billing code entry window
Tap the [CA] key.