COPYING
COPYING A PAMPHLET
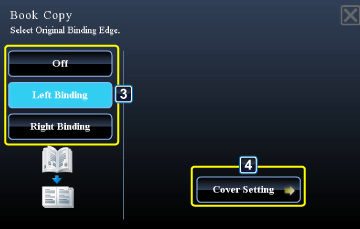
Book copy
< steps in all >
 Place the original on the document glass.
Place the opened pages of the "front and last sheets".
_BOOK-COVER.jpg)
 Tap the [Others>>] key, and tap the [Book Copy] key.
 Select a binding position.
When not inserting a cover, tap the  and [<<Back] keys in sequence. Then, go to step 5.
To cancel book copy:
Tap the [Off] key.
Tap the [Off] key.
 When inserting a cover, tap the [Cover Setting] key, and tap the [On] key.
To make a copy on the inserted cover sheet, check the [Make Copy on Cover (Duplex)] box so that  appears.
02035001.jpg
To change the cover input tray:
Tap the [Paper Tray] key to display the tray selection screen. Tap the cover input tray on the tray selection screen. For more information, see "SELECTING THE PAPER TRAY FOR COPYING".
- If the cover will be copied on, label sheets, transparency film, and tab paper cannot be used.
- This setting is not available when the covers/inserts function is disabled in the setting mode.
After the settings are completed, tap and [<<Back] keys in sequence.
 Tap the [Preview] key to scan the first original page.
Scanning of the original starts.
 Place the next opened original pages, and tap the [Additionally Scan] key.
Repeat this step until all original pages have been scanned.
Scan the remaining original pages in the following order:
Scan the remaining original pages in the following order:
- Inside of the front cover and the 1st page (facing pages)
- Inside of the 2nd and 3rd pages (facing pages)
- ...
- Inside of the last page and back cover (facing pages)
Copy settings cannot be changed when scanning additional pages.
 Check the preview image in the preview screen.
Check whether or not settings produce the required results.
To cancel all settings:
Tap the [CA] key.
Tap the [CA] key.
 Tap the [Original Scan End] key to start copying.
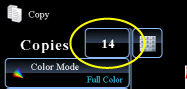
When making only one set of copies, you do not need to specify the number of copies.