SPECIFYING THE TIME FOR COMMUNICATION(TIMER)
Overview
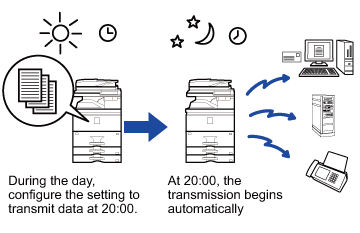
Specify a time at which a transmission or broadcast transmission will automatically take place. Transmission begins automatically at the specified time.
This function is helpful when you wish to perform reserved, broadcast or other transmissions during your absence or at night or other times when telephone rates are low. A timer setting can also be specified for polling reception to receive a fax when you are not present.
This function is helpful when you wish to perform reserved, broadcast or other transmissions during your absence or at night or other times when telephone rates are low. A timer setting can also be specified for polling reception to receive a fax when you are not present.

- When a timer transmission is set, keep the main power switch "
 ". Transmission will not take place if the status is "
 " at the specified time.
 - When performing a timer transmission, you must scan the original into memory when you set up the transmission. It is not possible to leave the document in the document feeder tray or on the document glass and have it scanned at the reserved time of transmission.
- Up to 100 timer transmissions can be stored at once.
- This function cannot be used in direct transmission mode or when the speaker is used to dial.

- If another transmission is in progress when the specified time arrives, the timer operation will begin after that transmission is finished.
- Only one timer polling operation can be stored at once. To receive data from multiple destinations by polling, specify Timer for serial polling.
- Settings selected for a timer transmission (exposure, resolution, other functions, etc.) are automatically cleared after the transmission is finished. (However, when the document filing function is used, the scanned original and settings are stored in the built-in hard drive.)
- If a job scheduled for timer transmission is given priority on the job status screen, the timer will be canceled. The transmission will begin as soon as the job in progress is completed.
- The time can be specified up to a week in advance.
- Other operations can be performed after a timer transmission is set up.
- A timer transmission can be deleted in the job status screen.
Operation
 Place the original.
 Place the original in the document feeder tray of the automatic document feeder, or on the document glass.
 Specify the destination fax number.
  Tap the [Others] key, and tap the [Timer] key.
  Tap the [On] key.
  Specify the date.
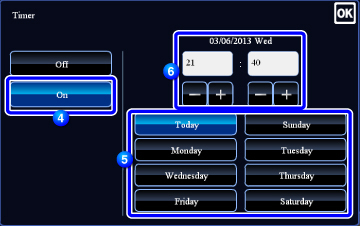
 Specify the time (hour and minute) in 24-hour format.
- Tap the areas displaying the hour and minute respectively, and enter the values using the numeric keys.
- It is convenient to use
 to finely adjust the time.
 - The setting will show the current time. If the time is not correct, press the [CA] key to cancel the operation. Correct the time in setting mode and then perform the timer transmission procedure.
To cancel the Timer Transmission settings:Tap the [Off] key.
After the settings are completed, tap  .
.
 Tap the [Start] key to start scanning of the original.
 - If you inserted the original pages in the document feeder tray, all pages are scanned.
A beep will sound to indicate that scanning has ended, and the machine stands by for transmission. - If you placed the original on the document glass, scan each page one at a time.
When scanning finishes, place the next original and tap the [Start] key. Repeat until all pages have been scanned and then tap the [Read-End] key.
A beep will sound to indicate that scanning has ended, and the machine stands by for transmission.
Tap the [Preview] key to preview the output image before sending it. After you have scanned an original by tapping the [Preview] key, tap the [Additional Scan] key to scan the next original. After checking the preview image, tap the [Start] key.For more information, see "CHECKING THE IMAGE TO BE TRANSMITTED".
 The original is scanned into memory. The original cannot be scanned at a specified time.